[1] This chapter desribes how to sign-in to Microsoft Office app. There are various forms of the license of Microsoft Office. The license for the students from our university makes your application to connect with your student account, so sign-in process is needed after the installation. If your Microsoft Office is ready to use without sign-in, you can continue to use it. The license given by the sign-in would be withdrawn when you graduate our university and lose the student account.
[2] This is a movie of the procedure described in this chapter.
[3] Open Start menu (1), then search "Excel" (or "Word" or "PowerPoint") from Start menu. You would find the application (3). Even if your PC was sold without Microsoft Office, you ought to have installed it in the previous chapter.
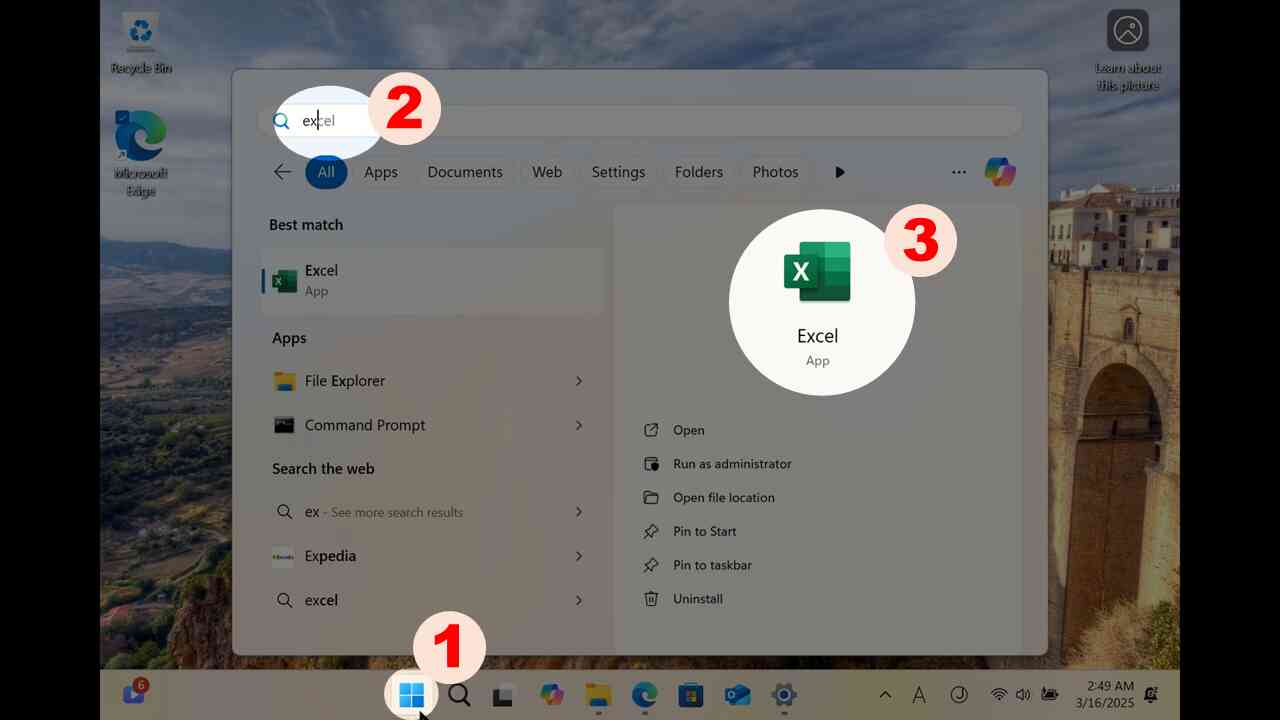
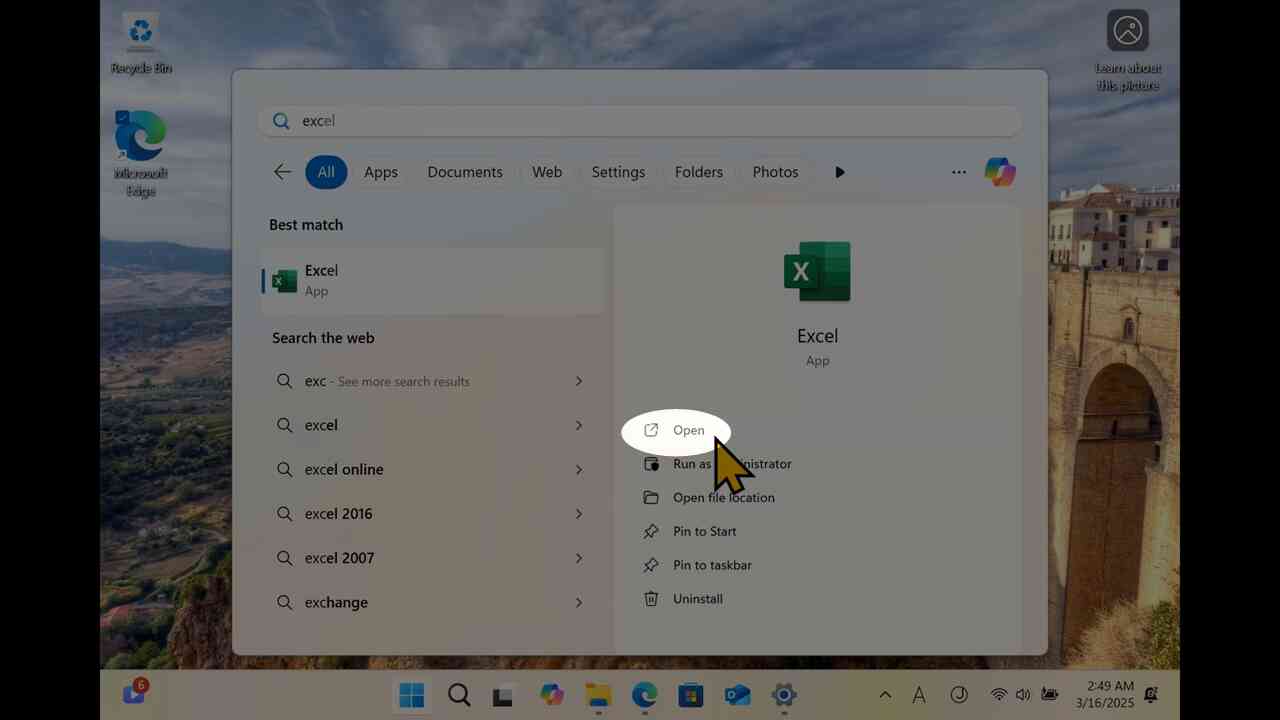
[4] Choose "Run" to start it.
[5] In this example, when "Excel" has started, the user has not activated your Microsoft Office, or signed-in by an account with the license.
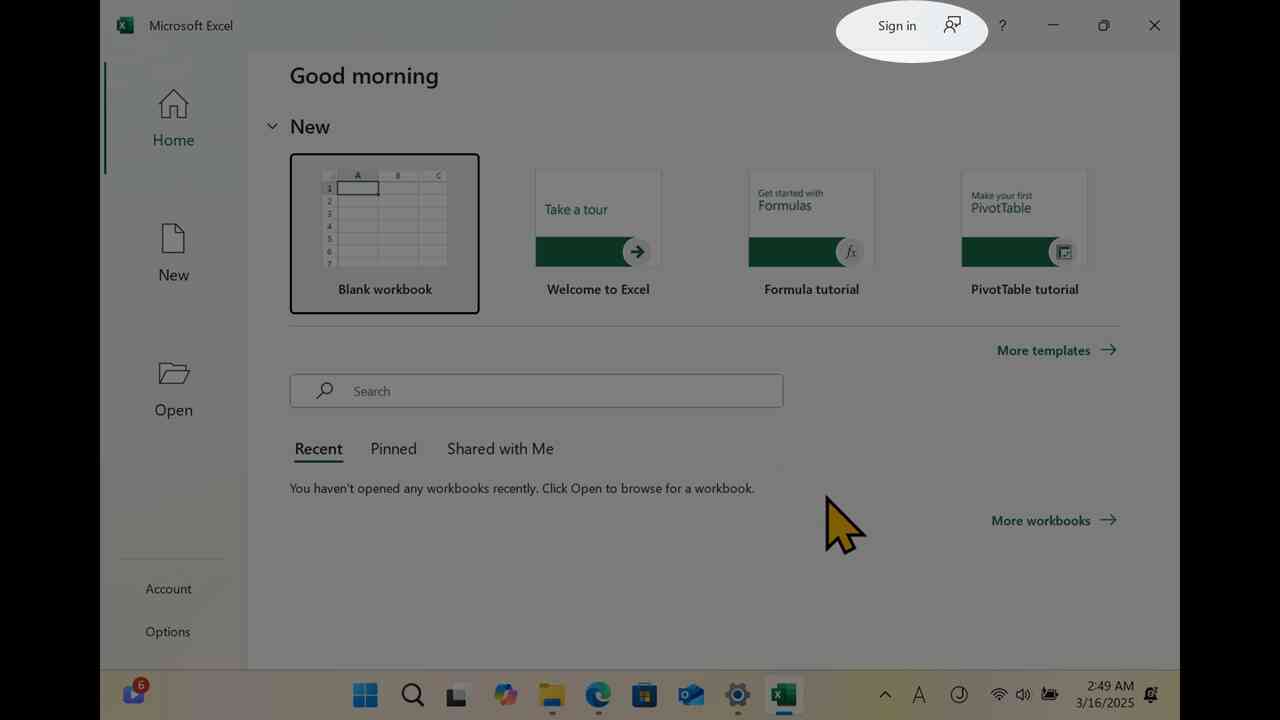
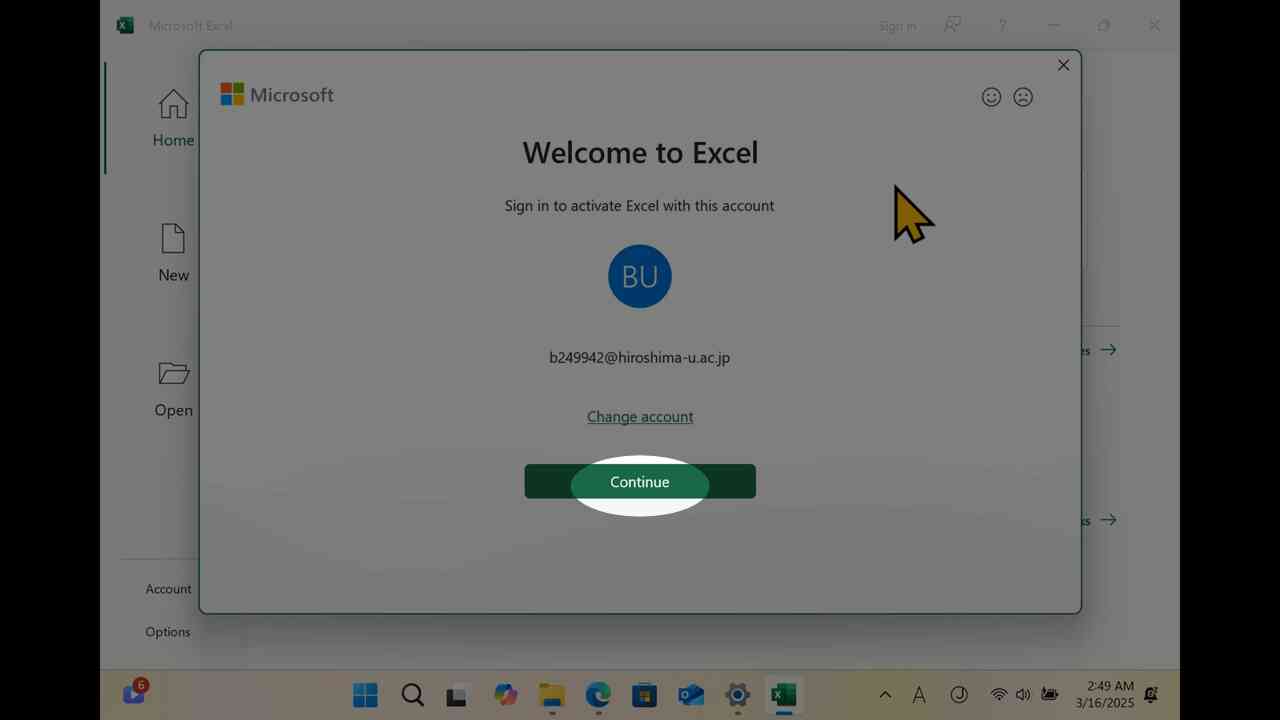
[6] Wait a while, or click "Sign in" on the top menu, "welcome" dialogue would be shown. Click "Continue" to sign in.
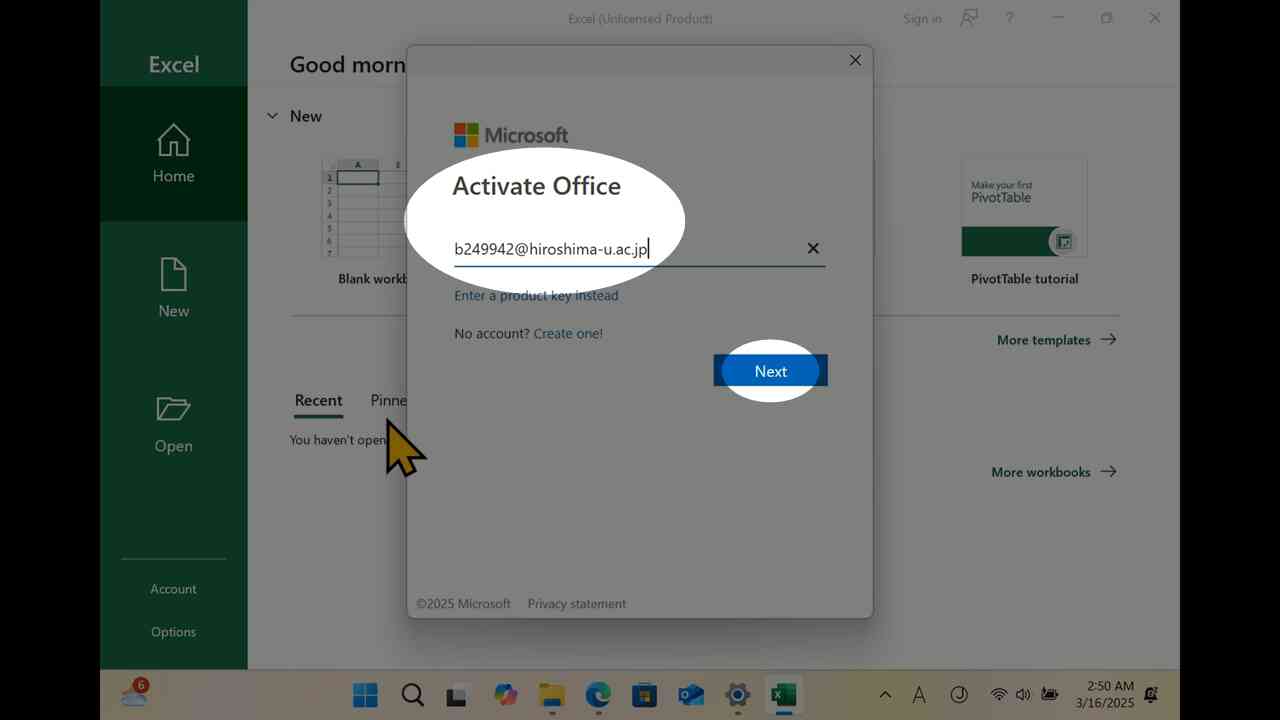
[7] Fill IMC account (starting with lowercase alphabet, followed by digits, plus "@hiroshima-u.ac.jp"), and click "Next".
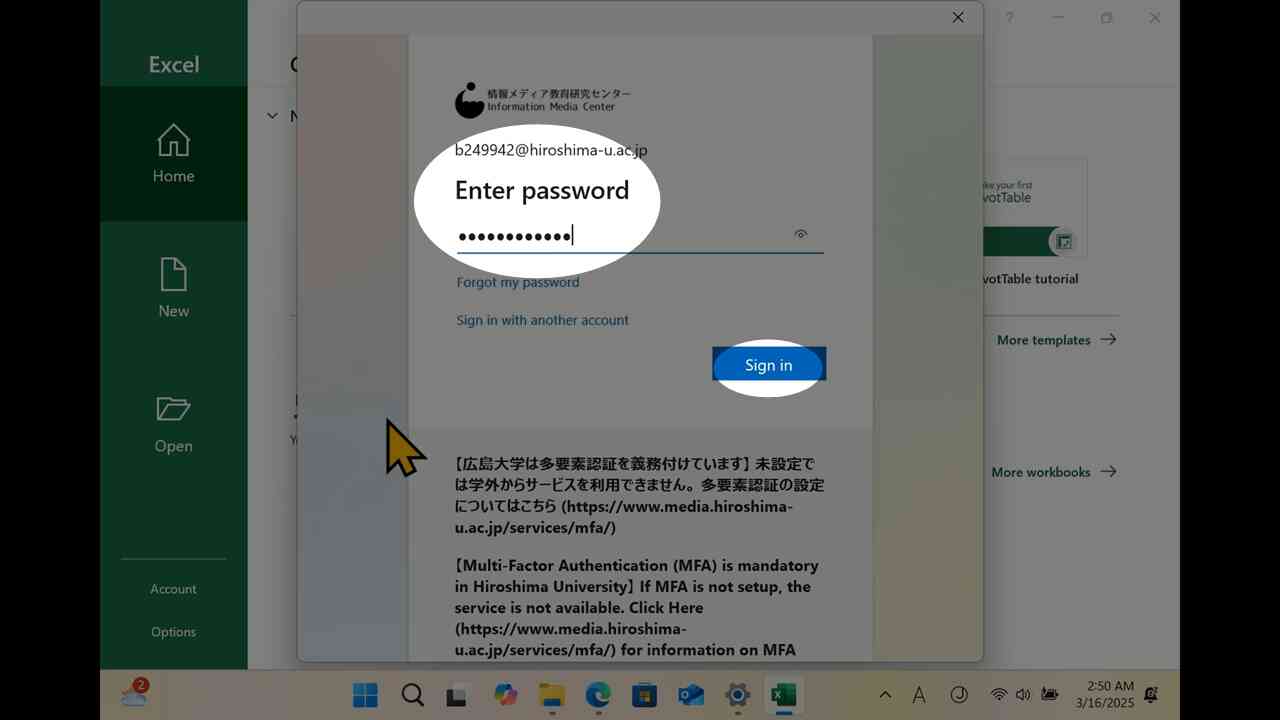
[8] Fill your password, and click "Next".
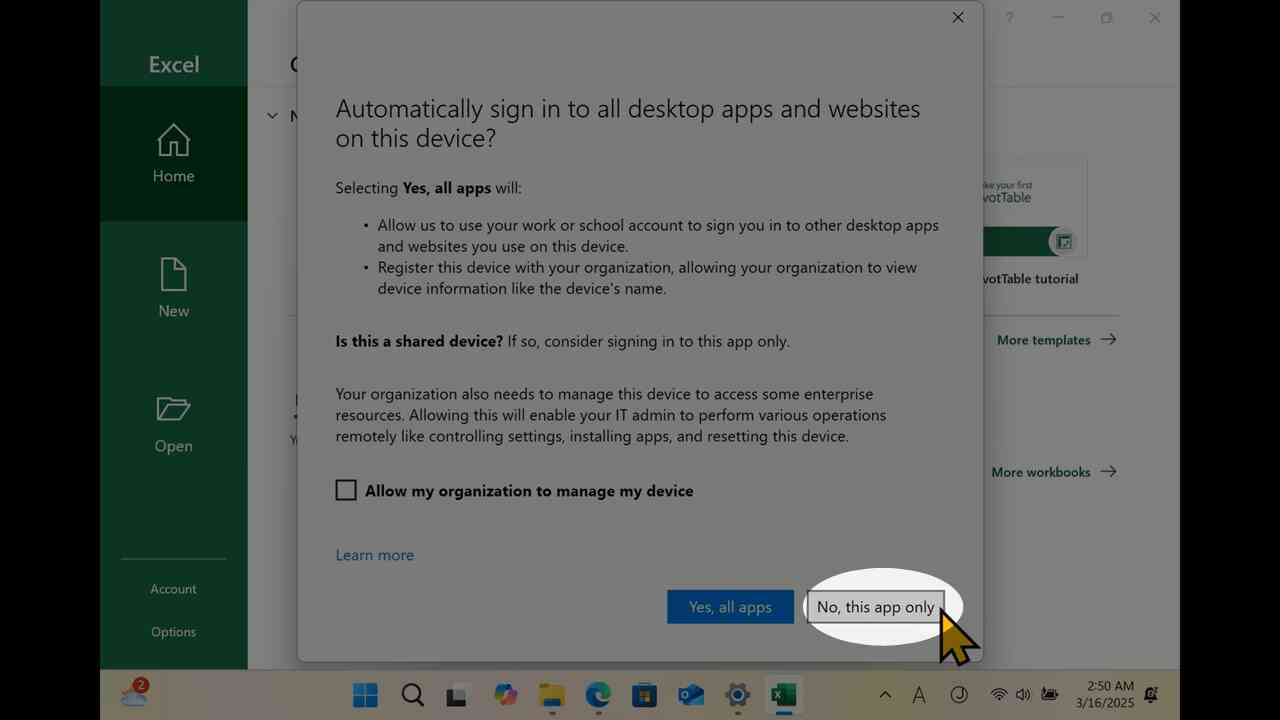
[9] You would receive such dialogue. Do not click blue button.
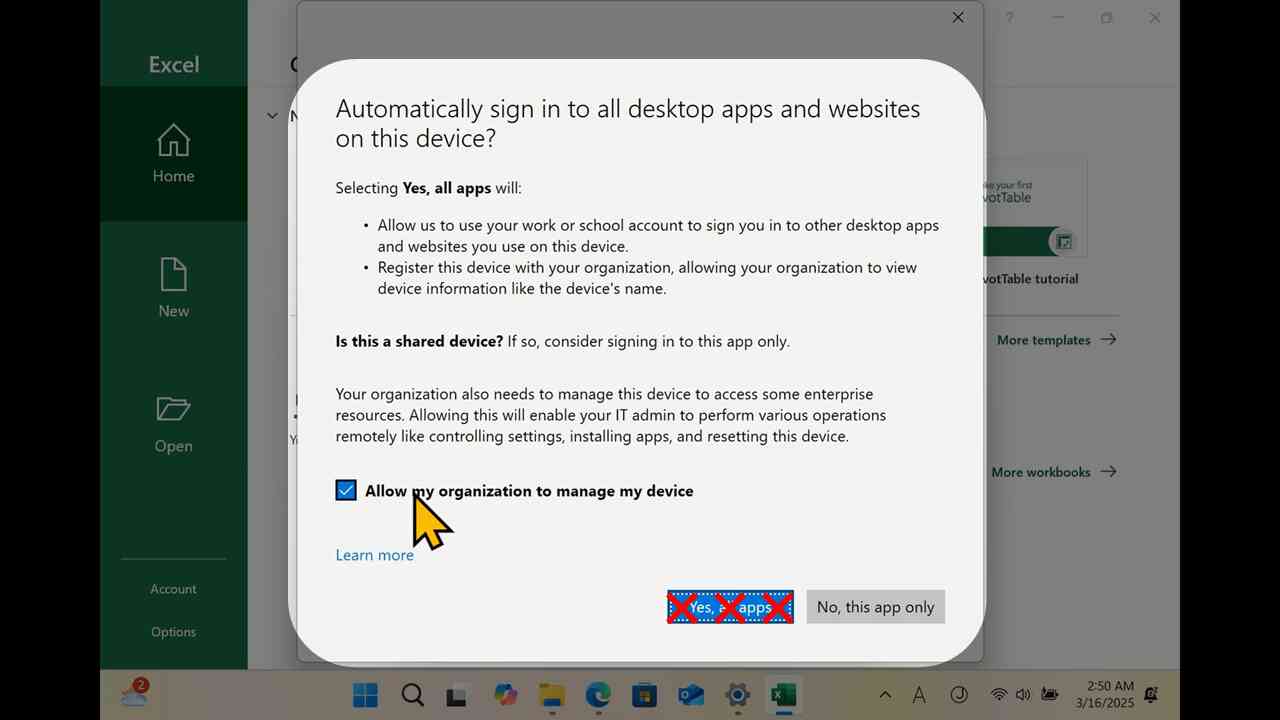
[10] Uncheck "Allow my organization…" and proceed by "No, this app only".
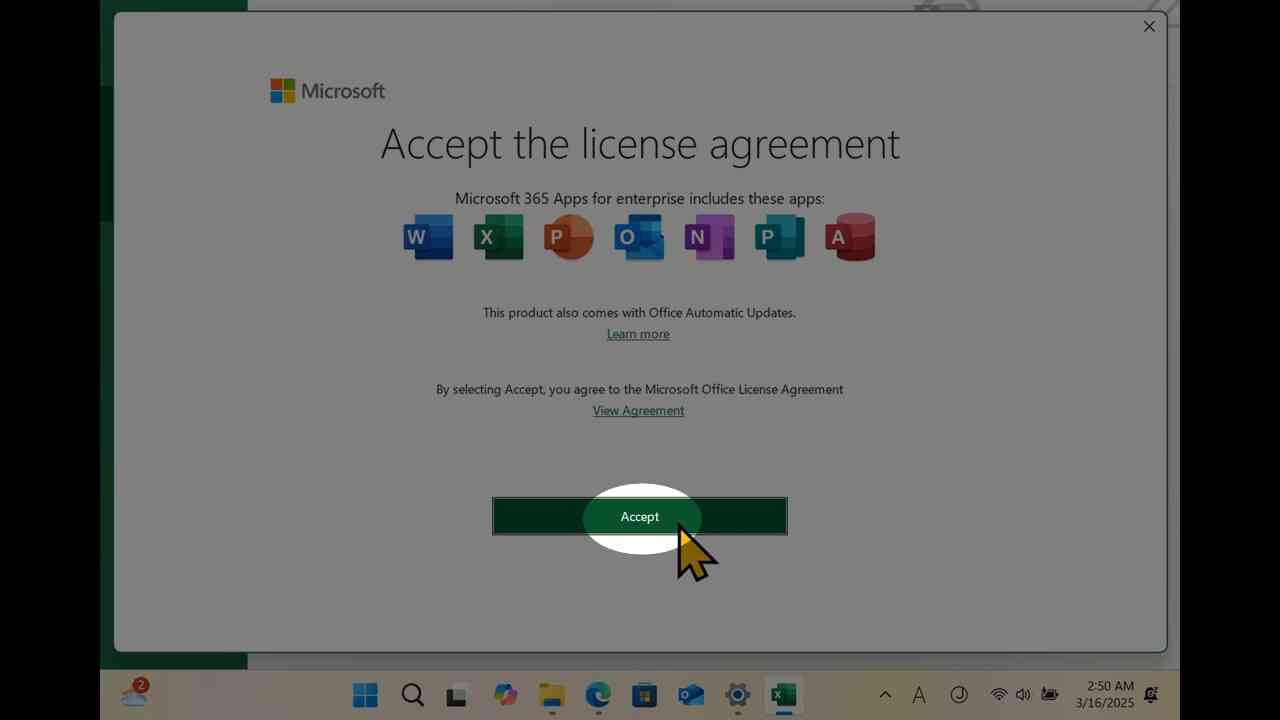
[11] Acceot the license agreement.
[12] "Sign in" is changed to your name.
[13] Clicking the name on the top menu would show the account information.

[14] Laptop PC Check List would ask whether your MS Office is ready to create documents, spreadsheets, and presentations.
check 9