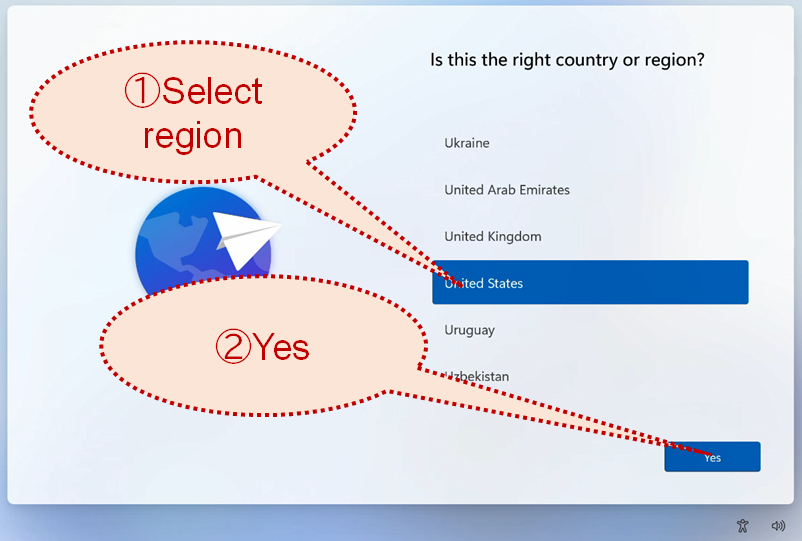
[1] For first, choose the regional culture which your computer is configured for.
[2] If you do not touch the keyboard or mouse, the computer starts to guide you by audio message. If it is bothering for you, please click the speaker icon and disable the audio guide.
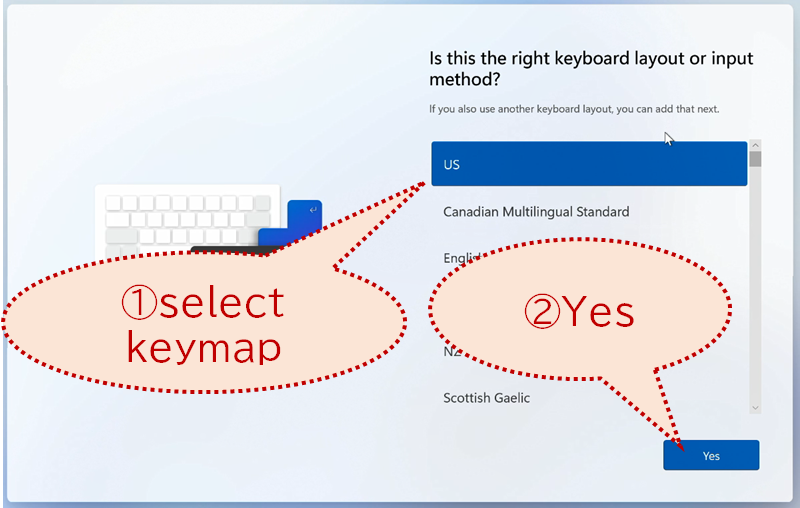
[3] Choose the keymap of your computer. If you bought your computer in Japanese market (without detailed instruction of the hardware), please be careful that the keymap can be different from the world-wide US keymap.
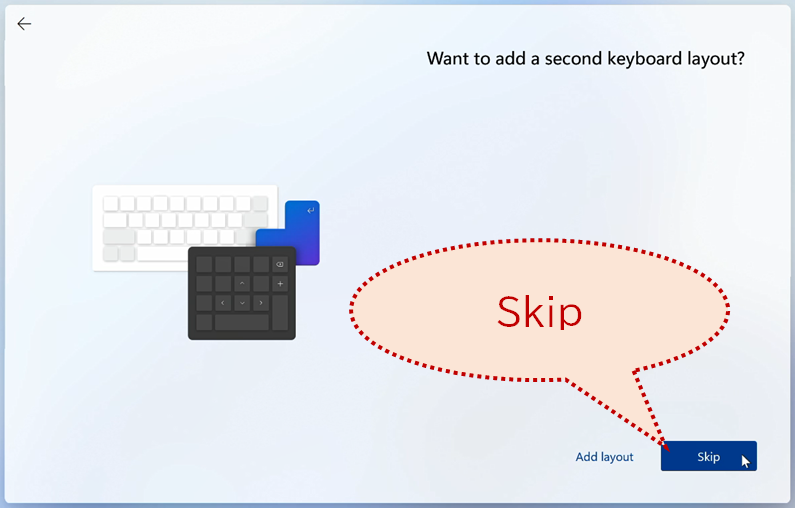
[4] The computer ask whether you need the extra keymap. If no need, you can skip.
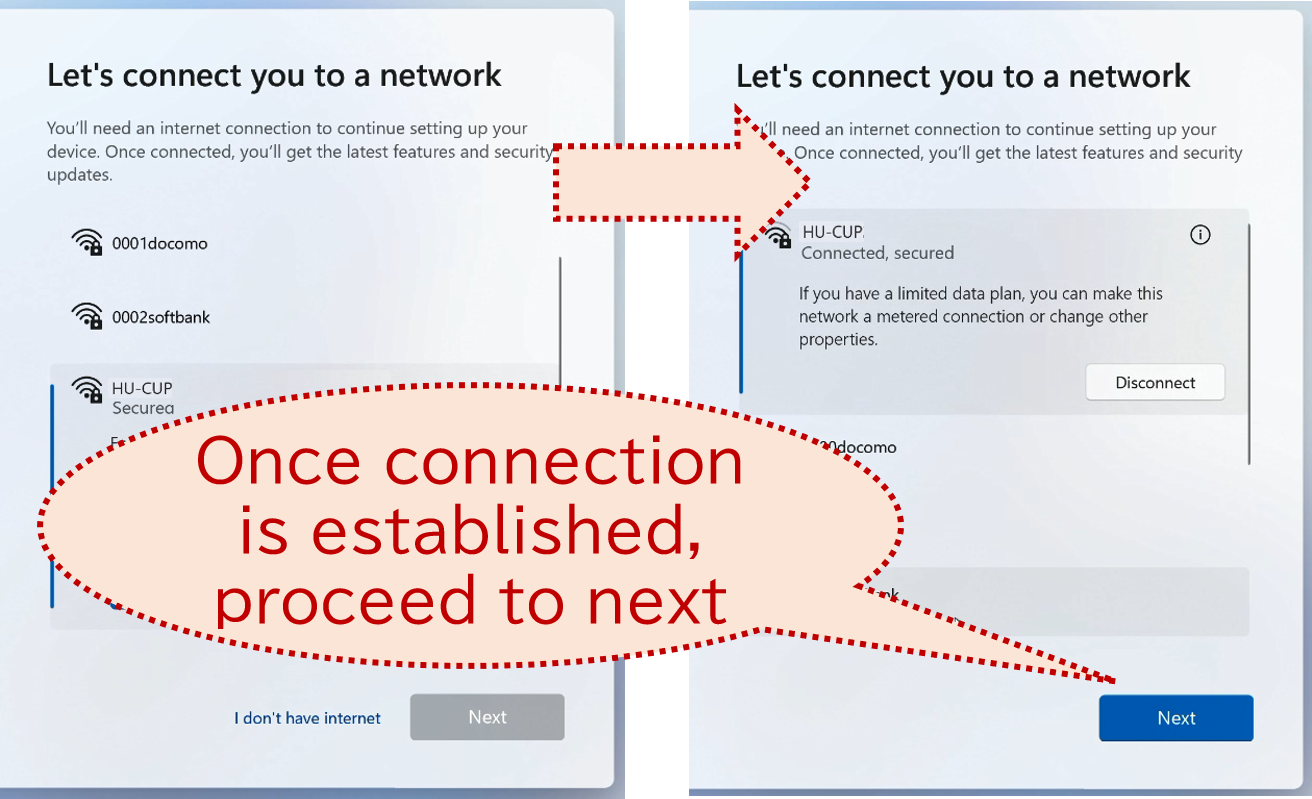
[5] You can find that the "Next" button is grayed out. Except of early revision of Windows11 Pro, Windows11 requires the network connectivity to proceed the initialization. Please connect to the Internet. When the Internet connectivity is confirmed, the "Next" button is changed to blue clickable button. Please click it and proceed for the next step.
If you do not have your own network environment, please visit our university, and connect to "HU-CUP" access point by the instruction described in the the chapter 7.
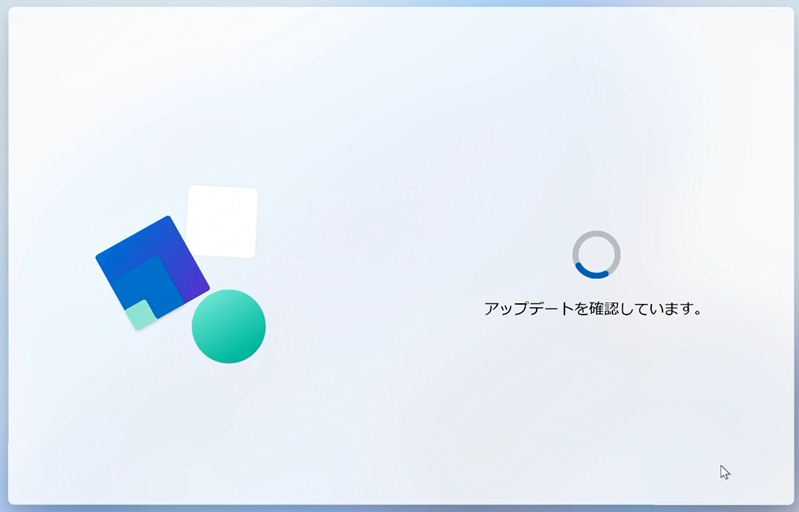
[6] Windows11 starts its own updating. It needs 10 minutes or so, depending on your speed of the network environment.
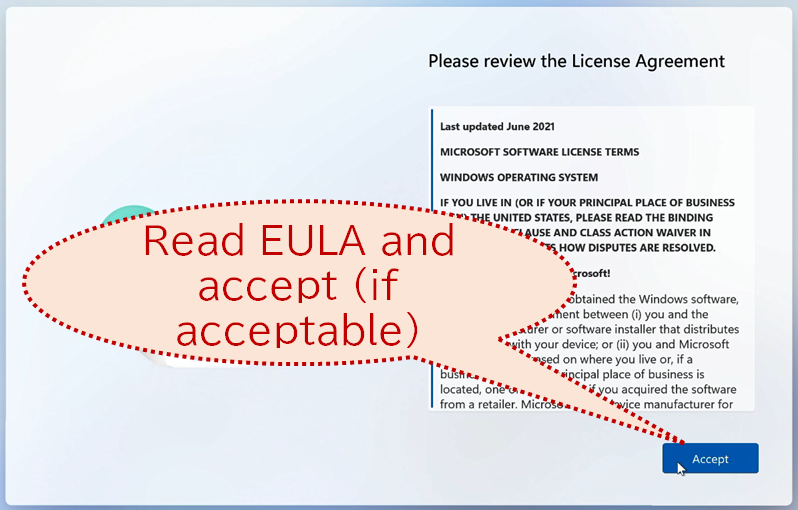
[7] The license of your copy of Windows11 is displayed. Please read it carefully (it is quite long). If you can accept, click the "Accept" button.
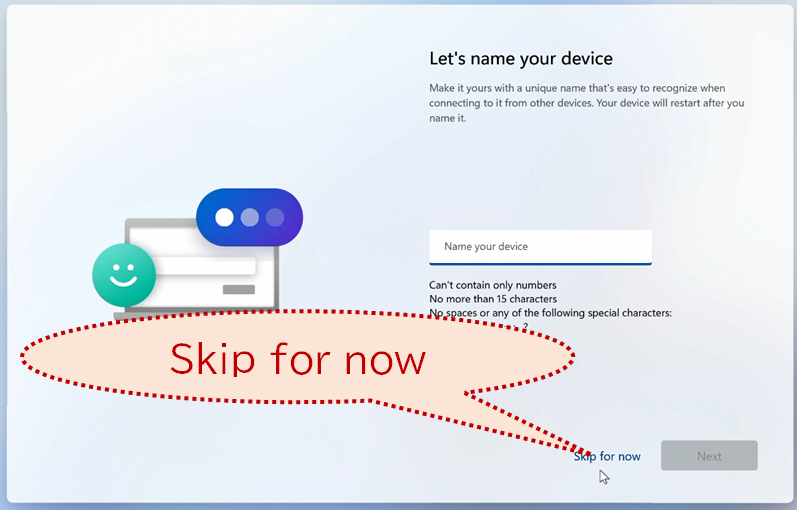
[8] The computer asks for its "computer name". If you have already decided the name for this computer, please give it (it may cause a restart of your computer). If you have no idea at present, click the "Skip for now".
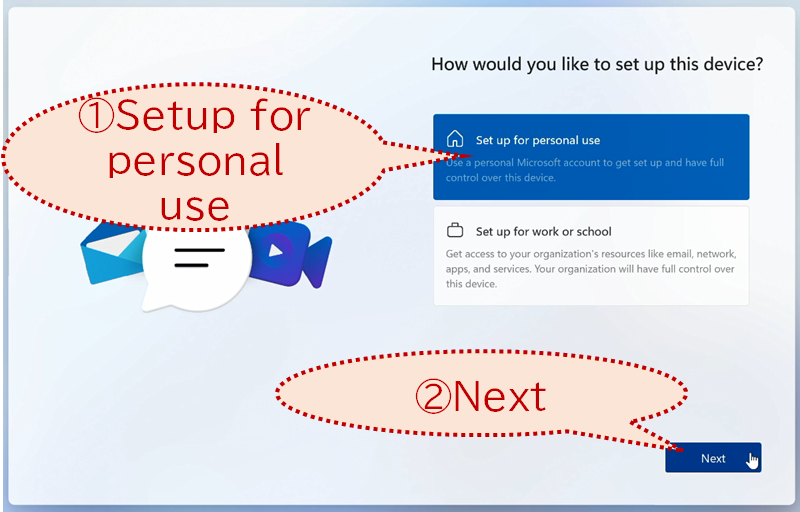
[9] You would be asked about the default backup throught the network (designed for the computer owned by the organization). Please choose "Set up for personal use".
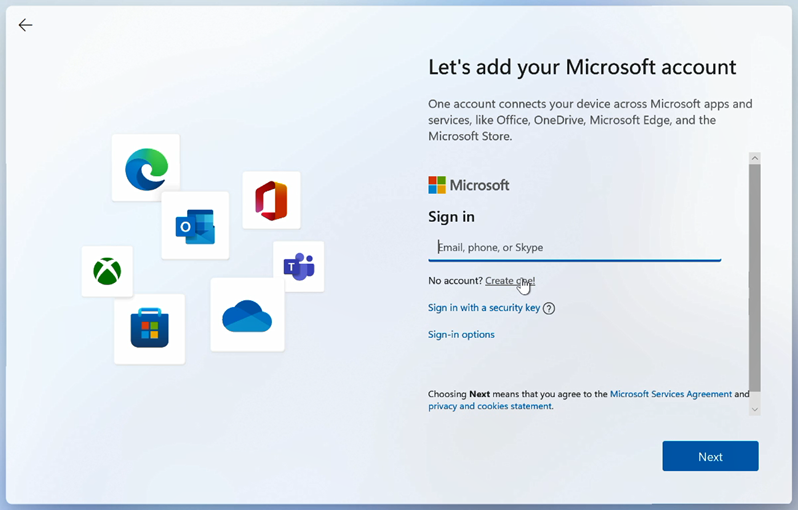
[10] You will be asked to add your "Microsoft account" to your computer. If you already have an email address in "@outlook.com" or "@outlook.jp", it would be an existing "Microsoft account" of you. The email addresses provided by Google, Yahoo, etc are not "Microsoft account", because their services are not provided by Microsoft. In below, we present the procedure to create new email address and reated Microsoft account.
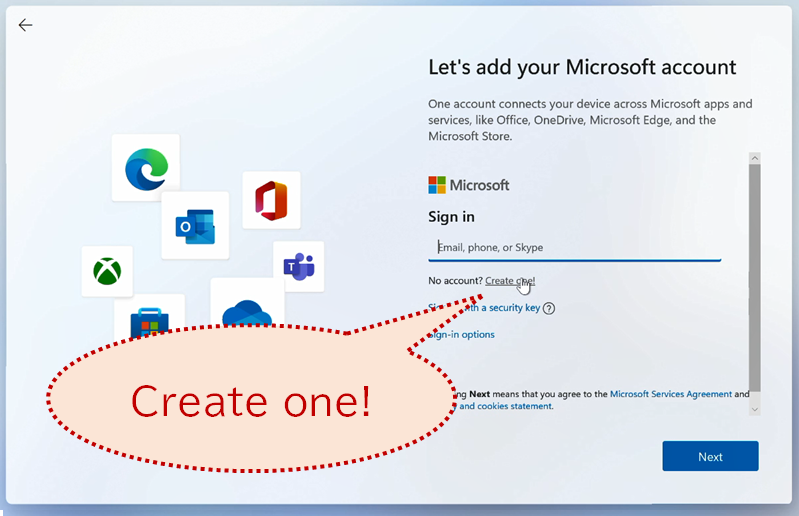
[11] Please click "Create one!".
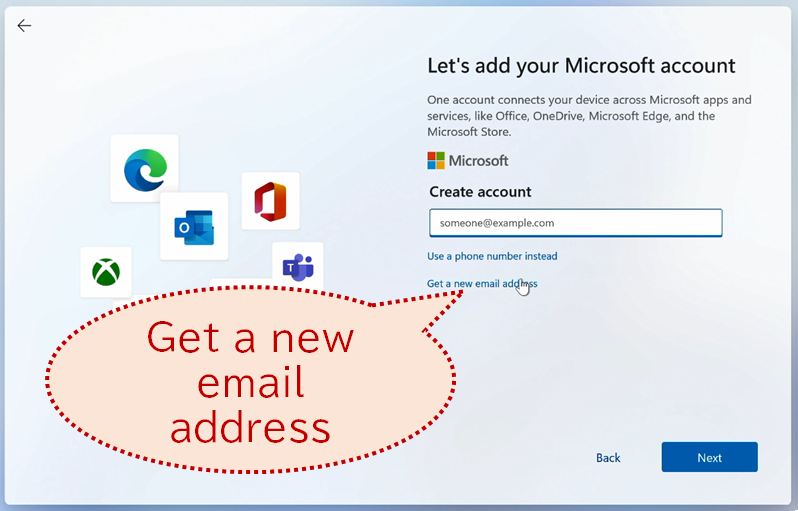
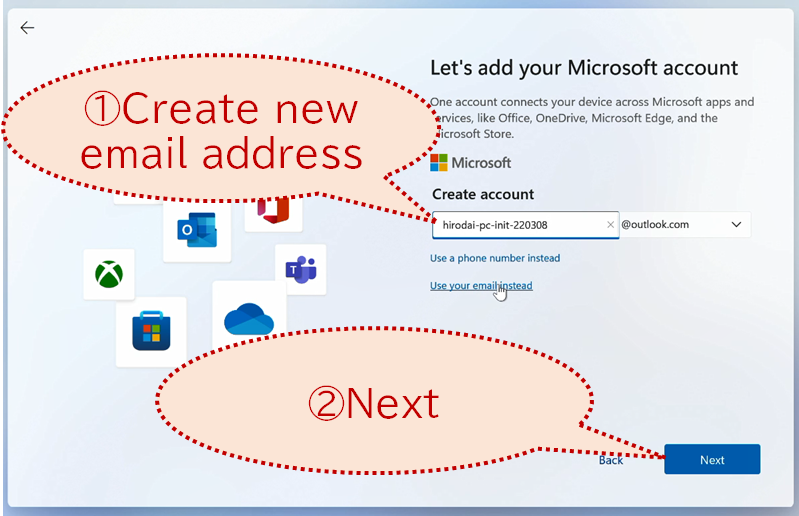
[12] You will be asked to create new Microsoft account by your existing (non-Microsoft) email. But to minimize the possible confusion, please click "Get a new email address".
[13] You will be guided to create new email account at "@outlook.com". Please input the name for that. You should be careful that the first 5 letters would be used as a shorthand account name in your computer (in this case, "hirod" would be it). Please make the first 5 letters of your account sufficiently distinctive.
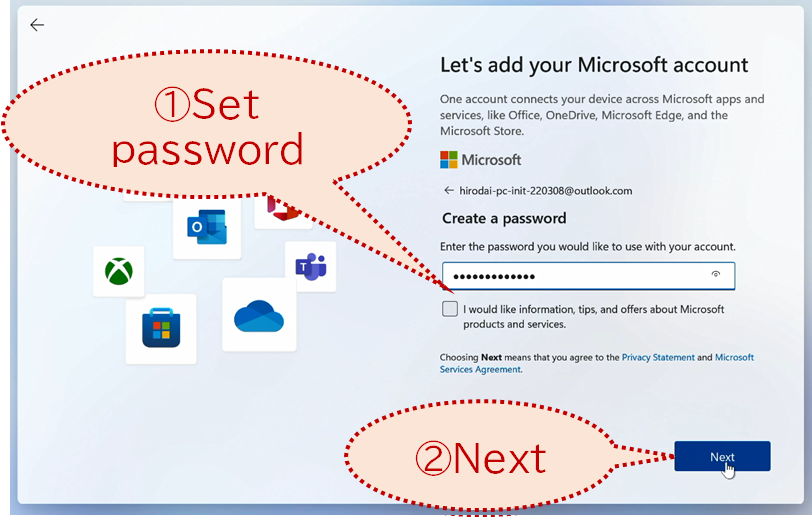
[14] Please set the password for the account. The password should be different from the passwords for other services provided by Hiroshima University.
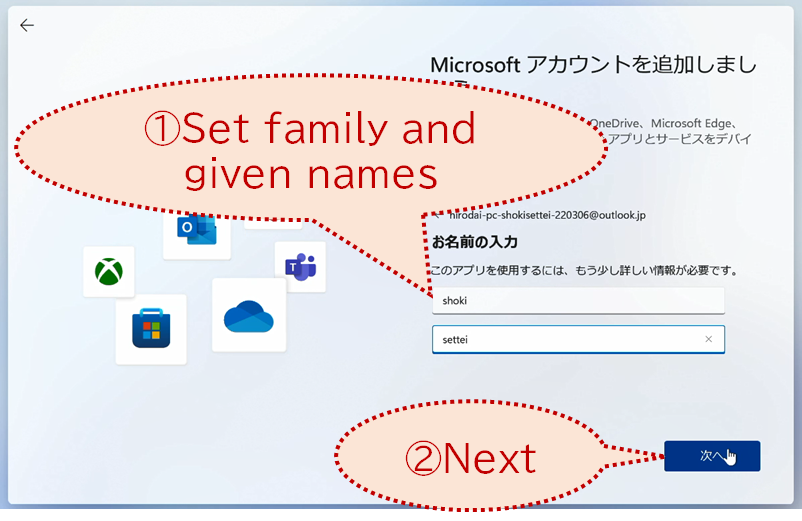
[15] Please set the full name of your account.
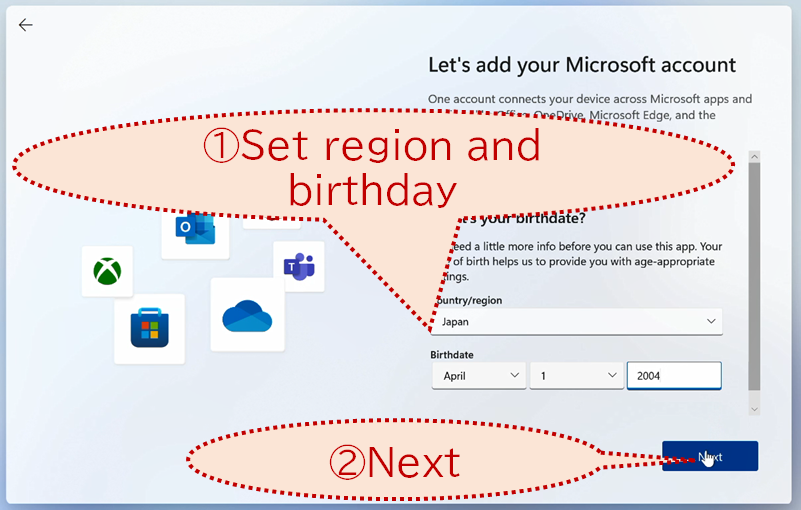
[16] Please set the region and your birthday.
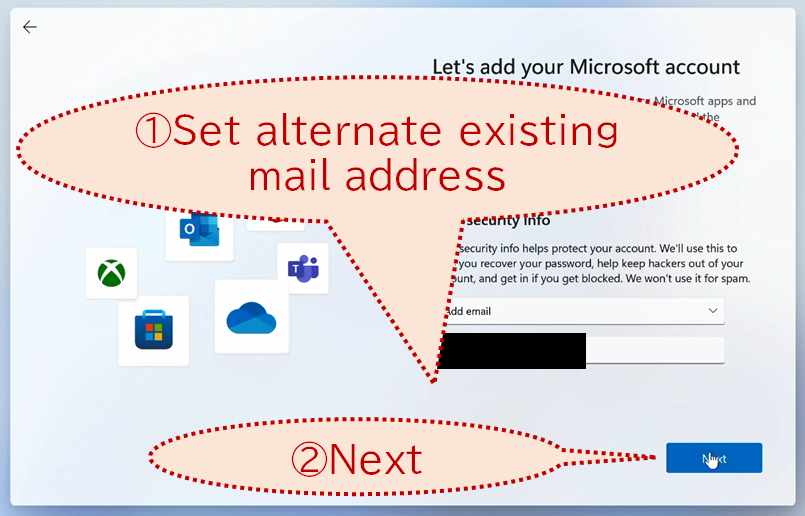
[17] Please set the alternative email address. It would be used when you lost the password of this new email account. Sometimes Microsoft would send onetime passcode to confirm your access.
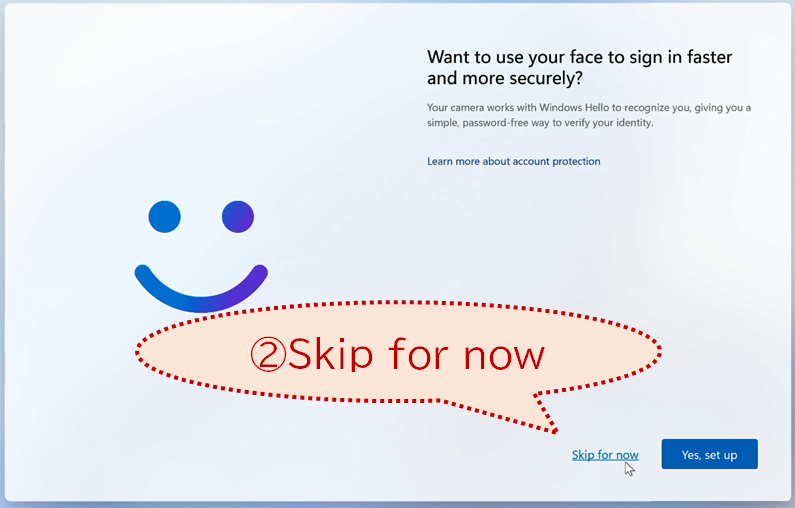
[18] You would be asked to configure the identification by your face. You can skipt it for now.
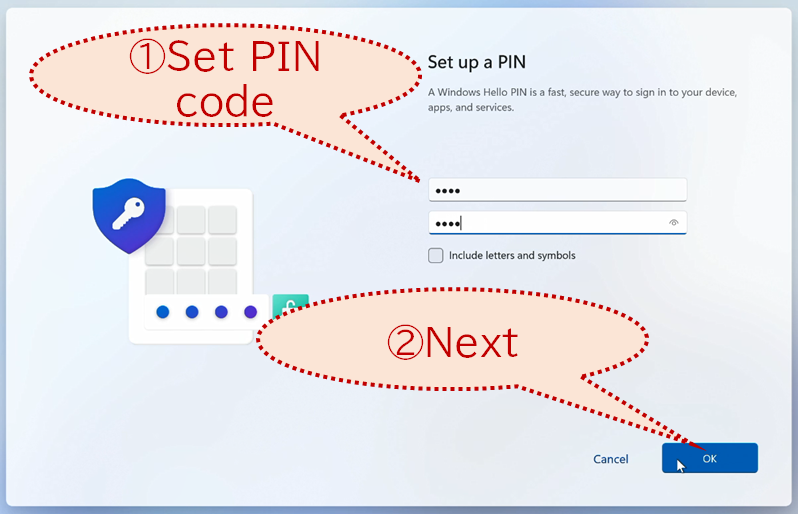
[19] Please set the "PIN" code to login your computer.
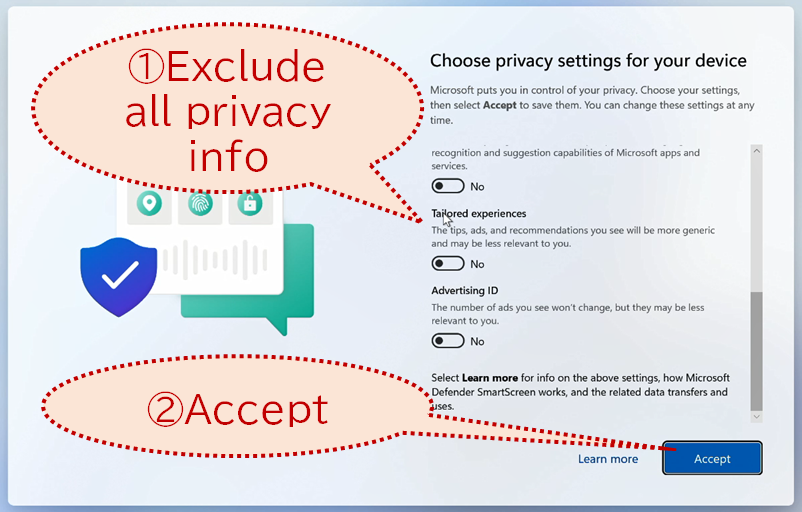
[20] Please configure the privacy setting. Basically it asks you to provide your privacy information to Microsoft and related companies, for the targetting advertisement. You can disable all switches.
[21] You would be asked for the customization of your experinece. Again it is the targetting advertisement, you do not have to choose any, please click "Skip".

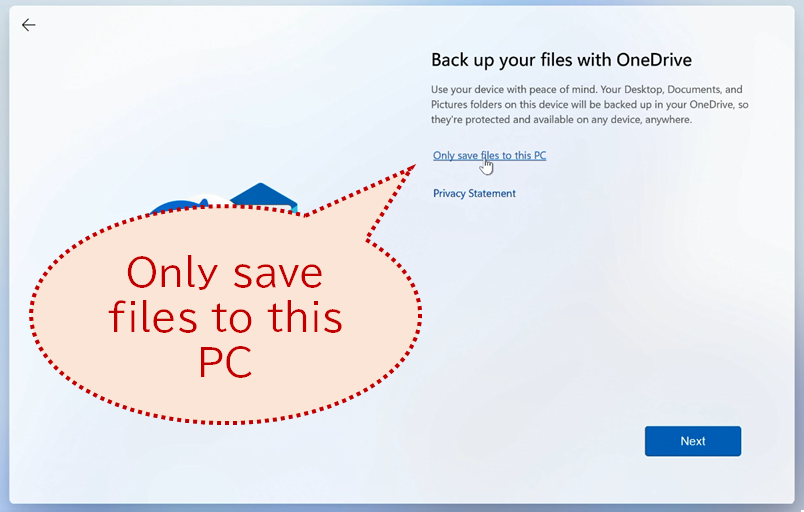
[22] You would be asked to the backup with OneDrive service of your "Microsoft account". The "Microsoft account" you got now is a non-charged account, so its capacity is much little (5GB) which you can exceed it soon. To minimize the trouble caused by the overflow, choose "Only save files to this PC".
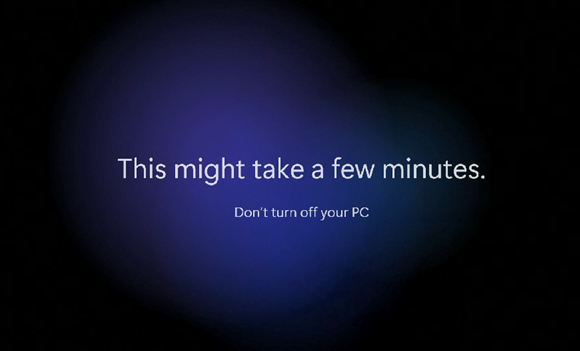
[23] The screen would be darken, and the preparation for your desktop environment starts.
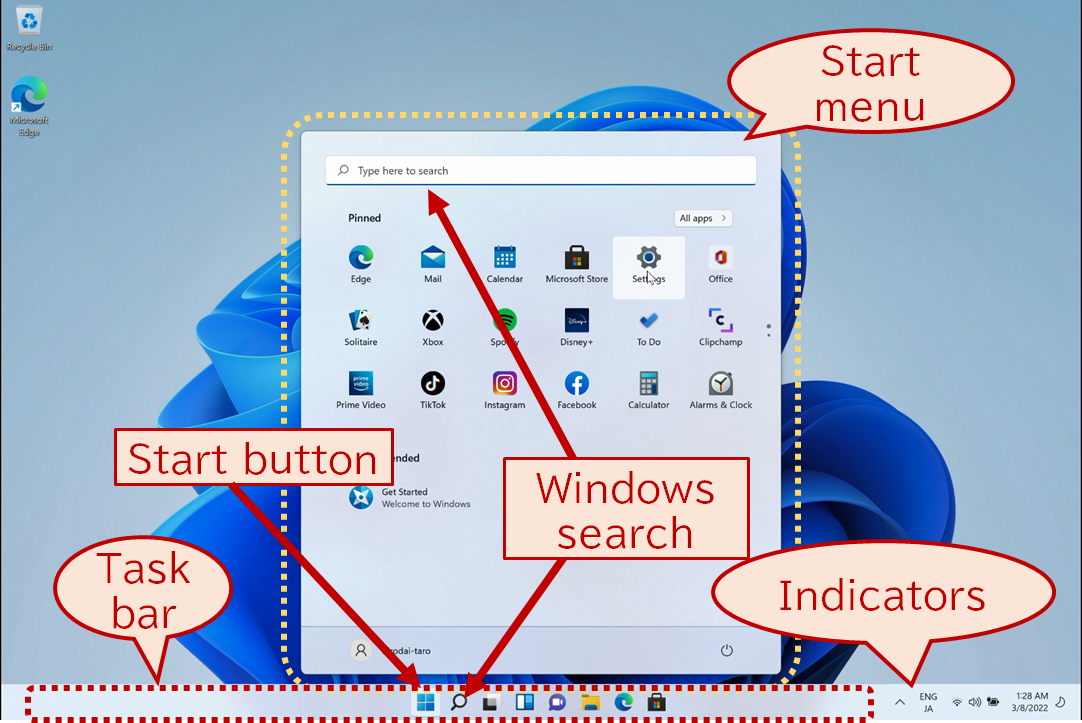
[24] Once the preparation is finished, you receive vanilla desktop environment with single "launcher" like window. This window is corresponding to the "start menu" in older Windows system. You can open this window by clicking the "window" button on the task bar at the lowest part of the window. Please click the "gear" icon to start the "Settings" application.