[1] Here, you will set up Windows Update which keeps your Wndows10 and Office updated.
Furthermore, you will learn how to use Microsoft Defender's full scan.
[2] Click the Start button on the lower left of your desktop.

[3] Click cog icon in the Start menu.

[4] Click “Update & Security”.

[5] "Windows Update" window appears. Windows OS and Microsoft Defender will be updated automatically and periodically.
You will know update status of your system. check-3, -4
Now turn on Automatic Updates in Windows Update. Click "Advanced options".

[6] Check the box for "Give me updates for other Microsoft products when I update Windows." Click the arrow displayed on the upper left corner of the window to return to "Windows Update" window.

[7] You will learn when your Defender is updated and how to update Defender. Defender is kept updated by Windows Update. But when the information about emergency vulnerabilities is issued, it is better for us to update Defender.
Click "Windows Security" listed in the left. Then click "Open Windows Security".

[8] Click "Virus & threat protection".

[9] "Threats" in Defender indicate computer viruses, spyware, or other malware. And "threat definition" is the file that contains the rule to distinguish those "threats" from other programs.
The information on "threat definition" is displayed on the middle of the window.check-5
In order to update "threat definition", click "Protection updates".

[10] When you click "Check for updates" button, Defender checks if there is the most recent "threat definition". If so, "threat definition" will be updated. Usually, updates are checked automatically and you do not need to press the button.
Click the arrow displayed on the upper left corner of the window to return to "Virus & threat protection" window.

[11] Now you will learn how to scan your whole PC for viruses. It will take a long time. So do not do it during this workshop.
The way of scanning whole computer system is called "Full Scan". There is another called "Quick Scan". It scans limited parts of the computer system because they are likely to be attacked. Therefore, "Quick Scan" runs quickly.
In order to run a full scan, click "Scan options".

[12] You can see three advanced scans. Choose "Full scan" and click "Scan now" button to run a full scan.check-6
But it will take a long time. Do not run a full scan during this workshop. But do it at the earliest opportunity after this workshop and fill out the checklist.
Click X on the upper right corner of the window to close it.

Save BitLocker access key, if it is enabled.
[13] Since Windows10, an encryption technology named "BitLocker" is introduced to prevent the access to your data in the case that your PC is stolen. Even if an user can access the PC or the internal stroage physically, the authentication is required to obtain the readable data from the storage. If "BitLocker" protection is disabled currently, future Windows Update may enable it without your agreement. Therefore, you should learn how to manage the "BitLocker" protection, and store its access key periodically.
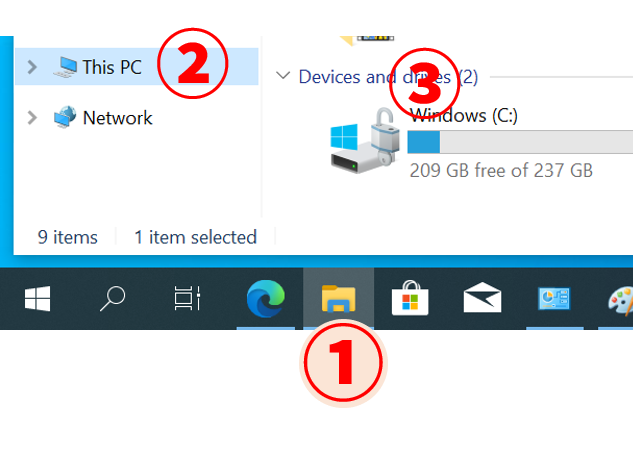
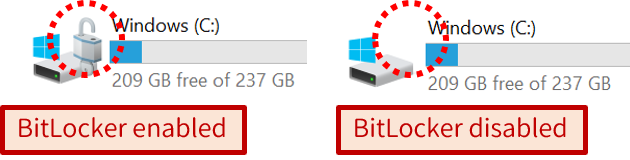
[14] Some laptop PCs with preinstalled Windows OS might have already enabled the "BitLocker" protection. If you open the system drive on your PC: ① click the "folder" icon on the task bar to execute "Explorer" application, ② select "This PC" folder from the side panel, ③ check the system drive and whether its has a padlock icon. If a padlock icon is found, "BitLocker" protection is already enabled.
[15] If no padlock icon is found, it means "BitLocker" protection is not enabled. If requried, please check the appendix of the chapter how to enable it. If you are in hurry, you can proceed to the next chapter, but be careful that "BitLocker" protection can be enabled accidentally, and if you leave it without storing its access keys, you could be unable to access your data on your PC. You must learn how to check the BitLocker access keys.
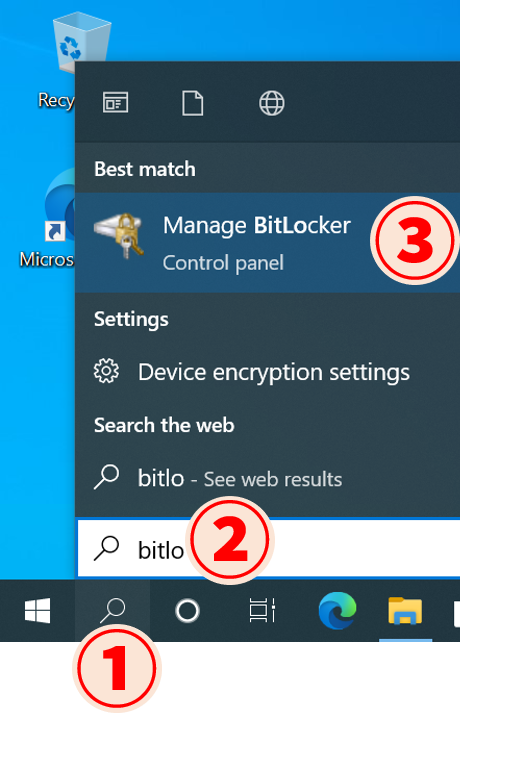
[16] ① click "loupe" icon on the task bar to start search feature ② enter "BitLocker" ③ start "BitLocker Manager".
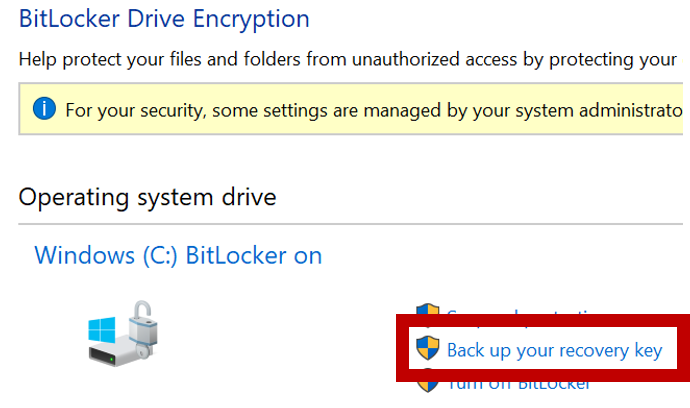
[17] Choose "Back up your recovery key"
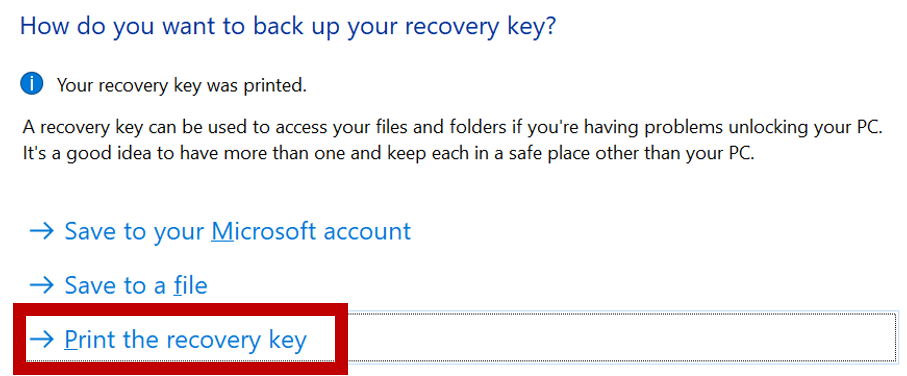
[18]
There are several methods to store the recovery key (access key), the easiest is the "Print the recovery key"
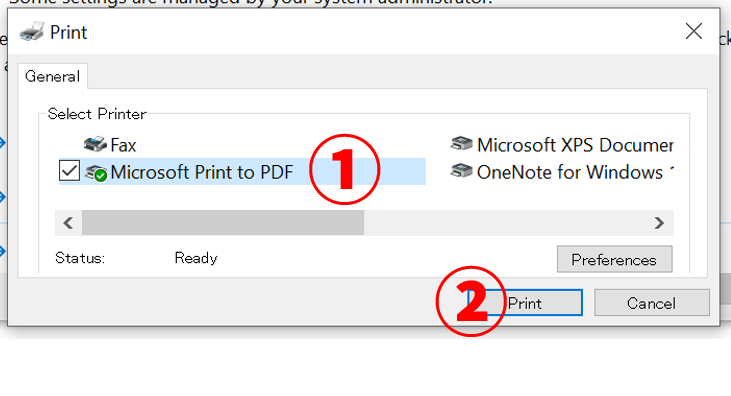
[19] ① choose "Microsoft Print to PDF" ② click "Print"
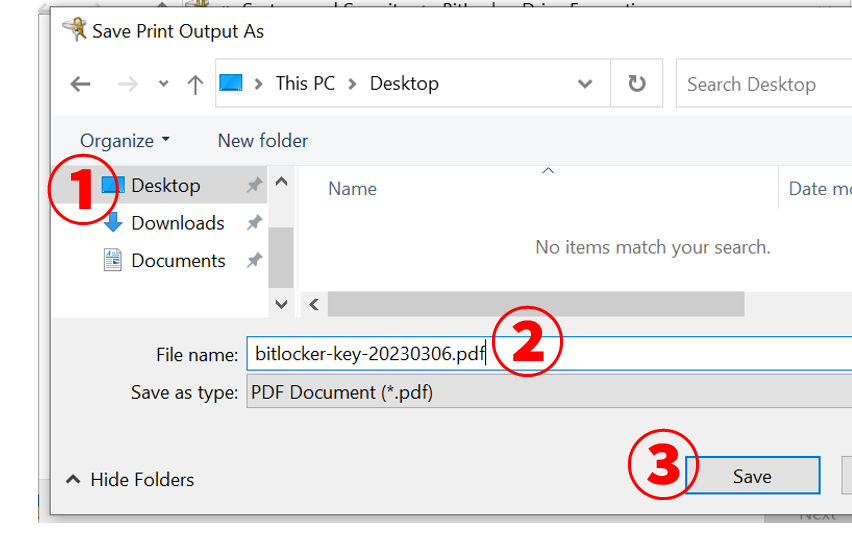
[20] You would be asked to locate the destination of the printed PDF. ①Please choose the "Desktop" folder", and ②give the appropriate name of the output file, ③ click "Save".
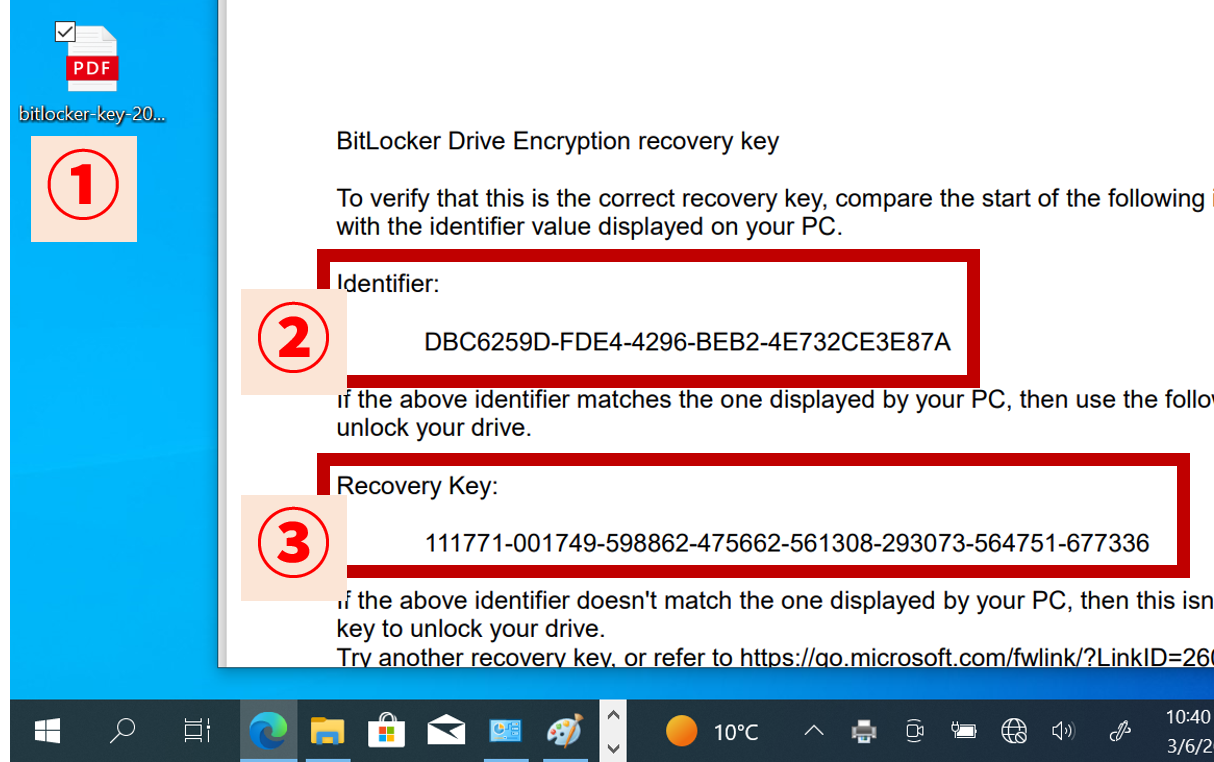
[21] After you find the PDF file on the desktop, ① open it and display the identifier ② and the recovery key ③. Please take the identifier and recovery key with your mobile device, or you can save this PDF file to the external storage.
[22] After the storing the access keys, please proceed to the next chapter.
(Appendix) How to enable "BitLocker" encryption.
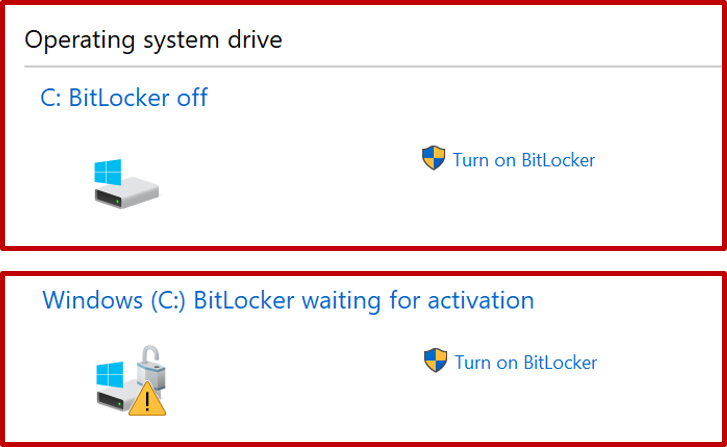
[23] If "BitLocker" is not enabled, there is only one meny in BitLocker Manager, "Turn on BitLocker".
[24] When you click "Turn on BitLocker", you would be asked how to store the recovery key. Please find the description in above.
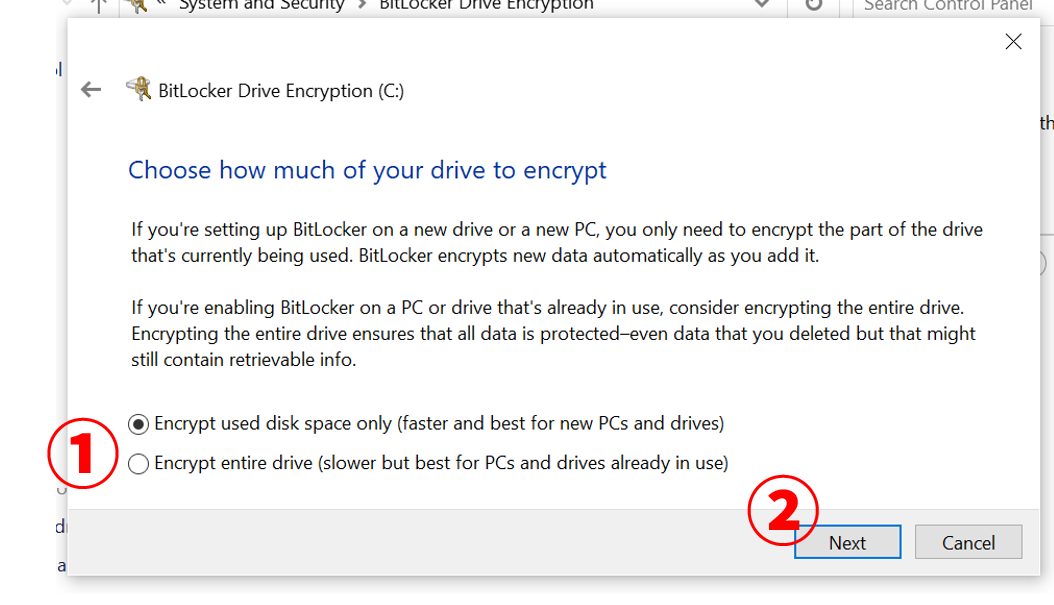
[25] After the storing the access keys, you would be asked the data to be encrypted; "individual data" or "whole drive".
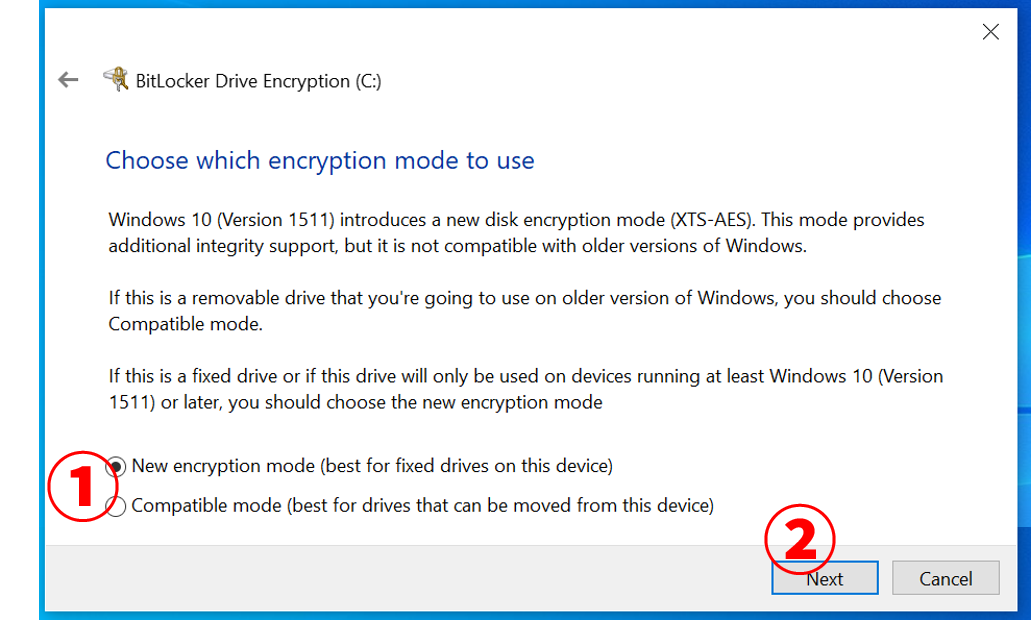
[26] You would be asked the algorithm of the encryption. If your PC was originally running an old version of Windows 10 (older than 2016), and there is a possibility that you may restore the original condition in future, "compatible" mode would be safer.
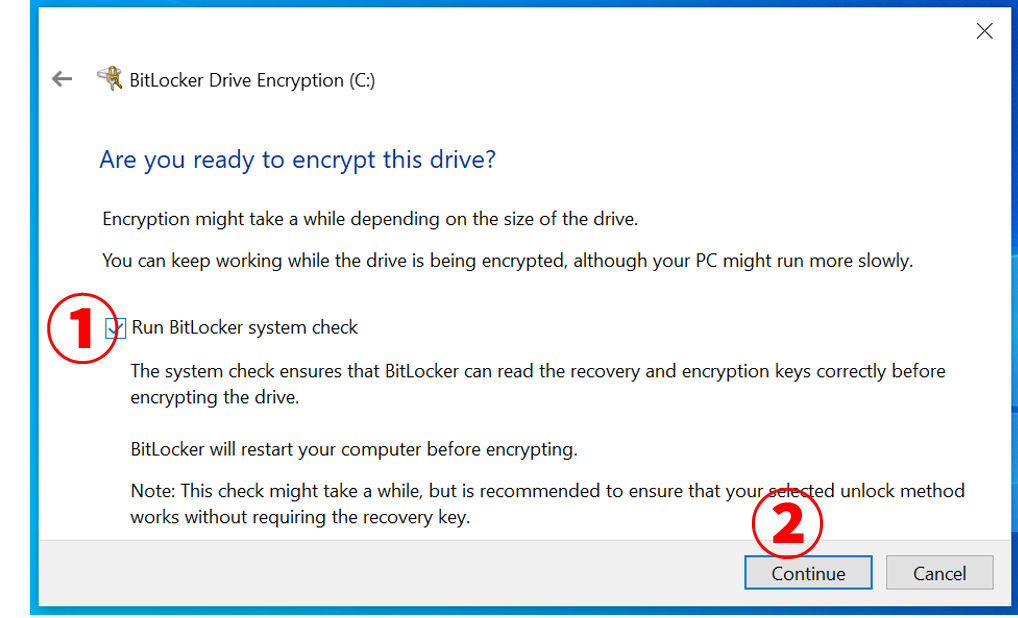
[27] "Run BitLocker system check" would be safer.
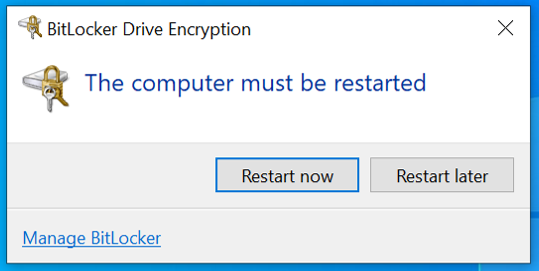
[28] You may be asked to reboot your computer.